Filters for landscape photography
Oct 8, 2014 15:44:58 GMT -5
Post by GaliWalker on Oct 8, 2014 15:44:58 GMT -5
My choice:
1 - Polarizer
My number-1 filter for landscape photography. All marketing sells this as "making the sky bluer". In reality it does much more than that. Basically a polarizer will reduce, or even remove, reflections. This means that you can use it to remove glare (e.g. sunlight reflecting off leaves), reflections from splashing water (especially useful for waterfall/stream photography), make clouds stand out in a sunlit sky, etc.
The effect of a polarizer can be increased or lessened by rotating it. Always look through the lens while rotating it, until you get the effect you want.
Pitfalls:
- When using wide angle lenses unsightly dark and light areas can appear in the sky. This is because a polarizer's effect decreases or increases based on whether you are shooting in the same plain as the sun or not, respectively (I won't go into the technical details of why this happens). A polarizer's effect will be maximum 90 degrees from the sun. So, if you include an area of the sky spanning 90 degrees or more of the sky, you are going to see the sky shaded from light blue to dark blue. In such situations, I just rotate the polarizer to lessen its effect until the brightness/color spread is more balanced.
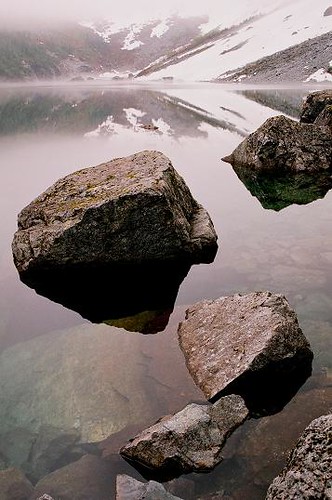
- Be careful photographing lakes when using a polarizer. In my opinion, reflections of the surroundings 'make' a lake. You don't necessarily want to see through the lake surface into its depths, which is what the polarizer will allow you to do. I still keep the polarizer on my lens, but rotate it until I get the effect I want.
- A polarizer will cost you 1.5-2.0 stops of light, which means that you might want to take it off in low light situations, if you want to handhold your shots.
2- Graduated neutral density filter
This is a filter that is dark on one half and clear on the other. The gradation can be gradual (soft GND) or sudden (hard GND). You use this filter in situations when you have a dark foreground and bright background, which is mostly what you get in landscape photography. In such situations you would fit the dark part of the filter in front of the bright background and the clear part in front of the darker foreground. Hide the dark to clear transition of the filter in the horizon, just a little more towards the darker park.
Personally, I use a 3-stop (the darker part cuts the light by 2x2x2=8 times), soft GND.
3- Neutral density filter
This last filter is just an overall dark filter to cut the light, say for taking longer exposures in sunny conditions. I use it sometimes for waterfall photography.
1 - Polarizer
My number-1 filter for landscape photography. All marketing sells this as "making the sky bluer". In reality it does much more than that. Basically a polarizer will reduce, or even remove, reflections. This means that you can use it to remove glare (e.g. sunlight reflecting off leaves), reflections from splashing water (especially useful for waterfall/stream photography), make clouds stand out in a sunlit sky, etc.
The effect of a polarizer can be increased or lessened by rotating it. Always look through the lens while rotating it, until you get the effect you want.
Pitfalls:
- When using wide angle lenses unsightly dark and light areas can appear in the sky. This is because a polarizer's effect decreases or increases based on whether you are shooting in the same plain as the sun or not, respectively (I won't go into the technical details of why this happens). A polarizer's effect will be maximum 90 degrees from the sun. So, if you include an area of the sky spanning 90 degrees or more of the sky, you are going to see the sky shaded from light blue to dark blue. In such situations, I just rotate the polarizer to lessen its effect until the brightness/color spread is more balanced.
- Be careful photographing lakes when using a polarizer. In my opinion, reflections of the surroundings 'make' a lake. You don't necessarily want to see through the lake surface into its depths, which is what the polarizer will allow you to do. I still keep the polarizer on my lens, but rotate it until I get the effect I want.
- A polarizer will cost you 1.5-2.0 stops of light, which means that you might want to take it off in low light situations, if you want to handhold your shots.
2- Graduated neutral density filter
This is a filter that is dark on one half and clear on the other. The gradation can be gradual (soft GND) or sudden (hard GND). You use this filter in situations when you have a dark foreground and bright background, which is mostly what you get in landscape photography. In such situations you would fit the dark part of the filter in front of the bright background and the clear part in front of the darker foreground. Hide the dark to clear transition of the filter in the horizon, just a little more towards the darker park.
Personally, I use a 3-stop (the darker part cuts the light by 2x2x2=8 times), soft GND.
3- Neutral density filter
This last filter is just an overall dark filter to cut the light, say for taking longer exposures in sunny conditions. I use it sometimes for waterfall photography.